6.1Brands
Keep the brands you sell — add a name and a logo, set the order, change them, and remove a brand — and see where brands appear in your shop.
- Menu:
- Brands
- Who:
- Owner · Manager · Staff
- Package:
- All packages
- Updated:
- 2026-10-15
Overview
A brand is the maker of a product, such as Studds. Each brand has a name, an optional logo and its own page in your shop, at /brand/ followed by the brand's address. The address is set when the brand is created and does not change when you rename the brand, so links you have shared keep working.
Owners, Managers and Staff can all open Brands. Only Owners and Managers can add, change or remove a brand. Staff see the list without the buttons, and a direct visit to the add or edit page sends them back to the list.
Brands appear in your shop in these places:
- The product page shows a Brand line when a product has one.
- The brand picker on a product, where you choose a brand for a product. A brand you cannot find there can be added from the picker.
- The Our brands section on the home page of your storefront, in the themes that have one. It appears as soon as your shop has at least one brand. Each brand shows its logo, or its name if it has no logo.
- The brand's own page, which shows its logo (or name) and its products.
- The brand filter on product listing pages.
Screen tour
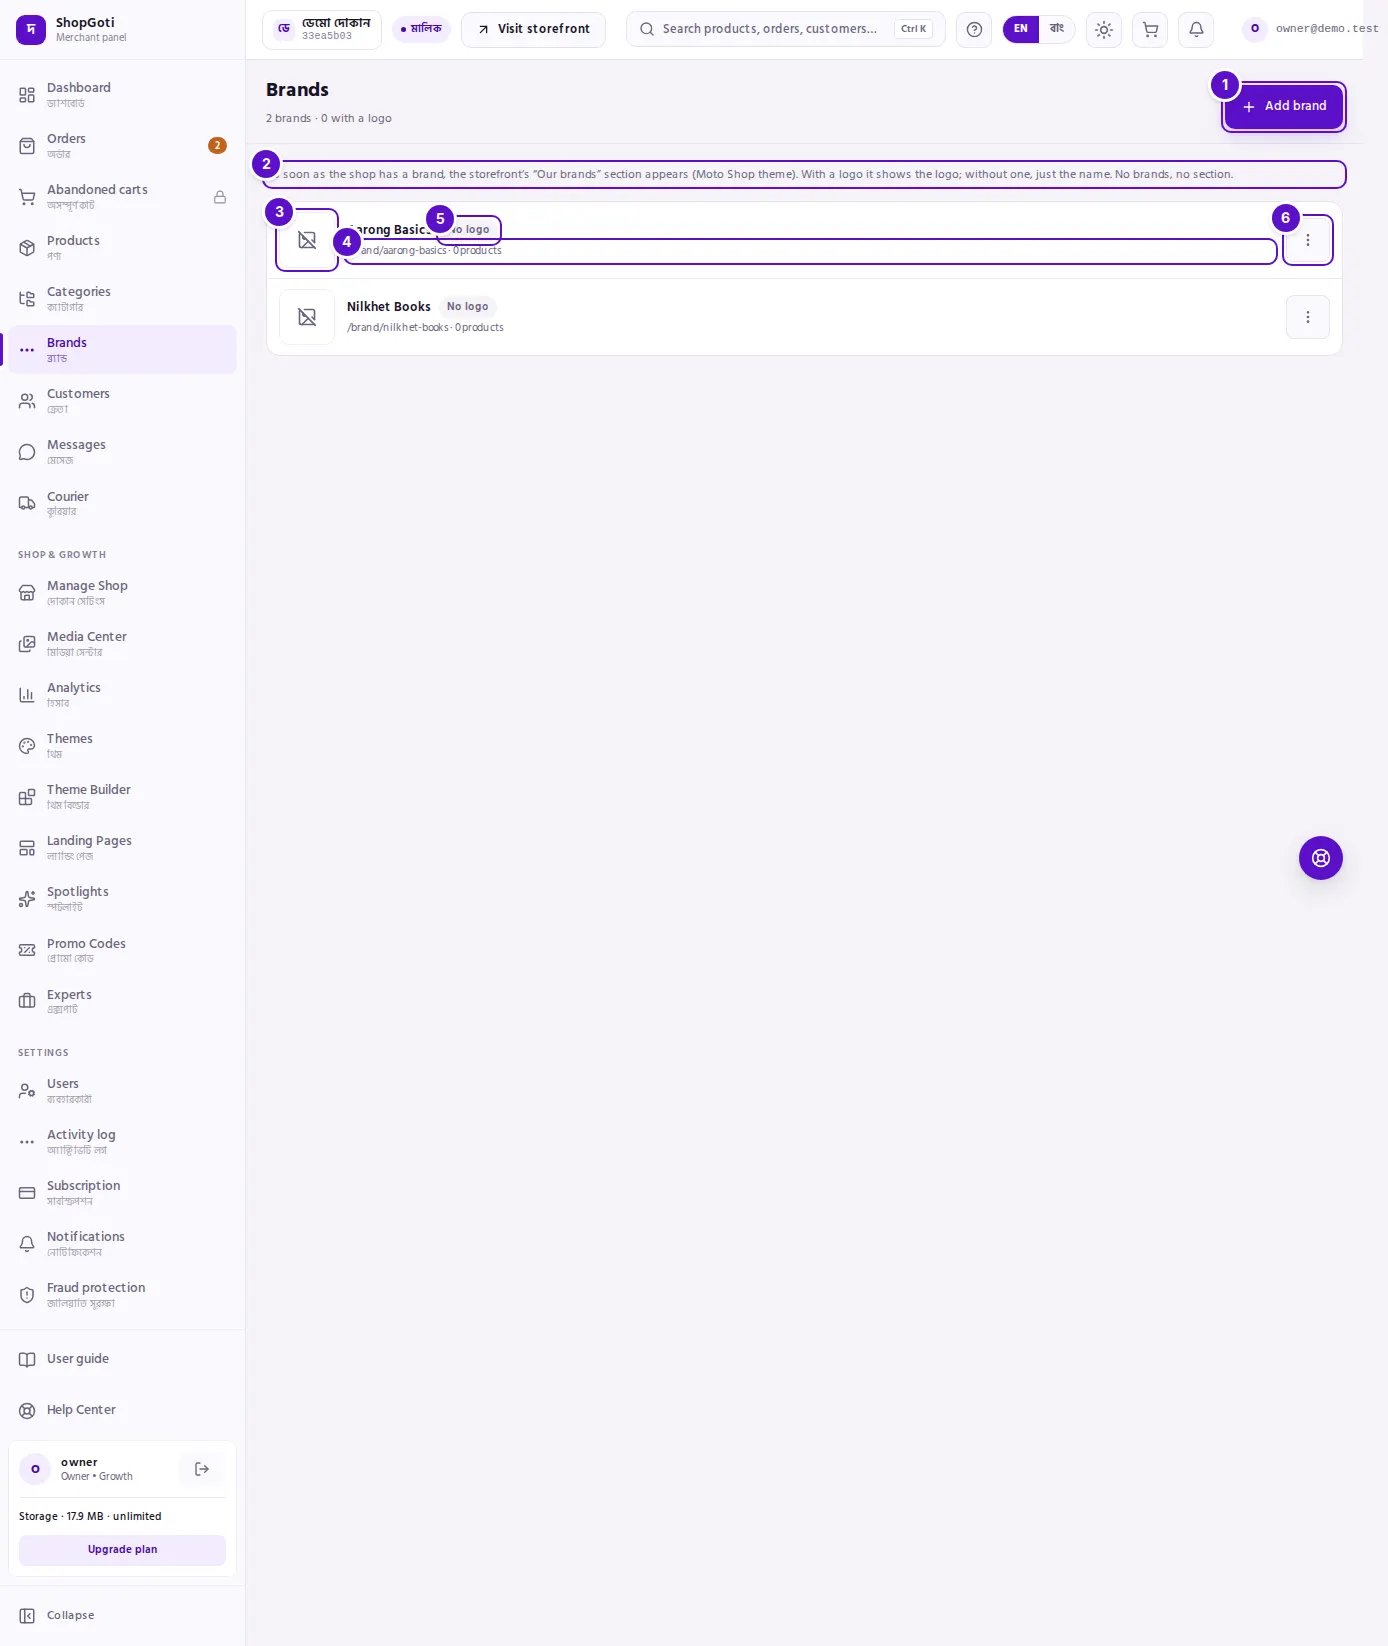
- Add brand — opens the form for a new brand. The form's own heading reads New brand.
- The note under the title — explains that brands appear on the storefront's home page and that a brand with no logo shows its name.
- A brand row — the logo tile on the left. A white tile with the logo inside it; when there is no logo, a picture icon appears instead.
- The name and its details — the name, then one line: the brand's address (
/brand/…), the number of products, and the order number (the order number shows only when you have set one). - No logo — a small tag on a brand with no logo. It is information, not a warning: the storefront shows the name.
- Actions (three dots) — opens the row menu with Edit and Remove.
The heading shows how many brands you have and how many of them have a logo.
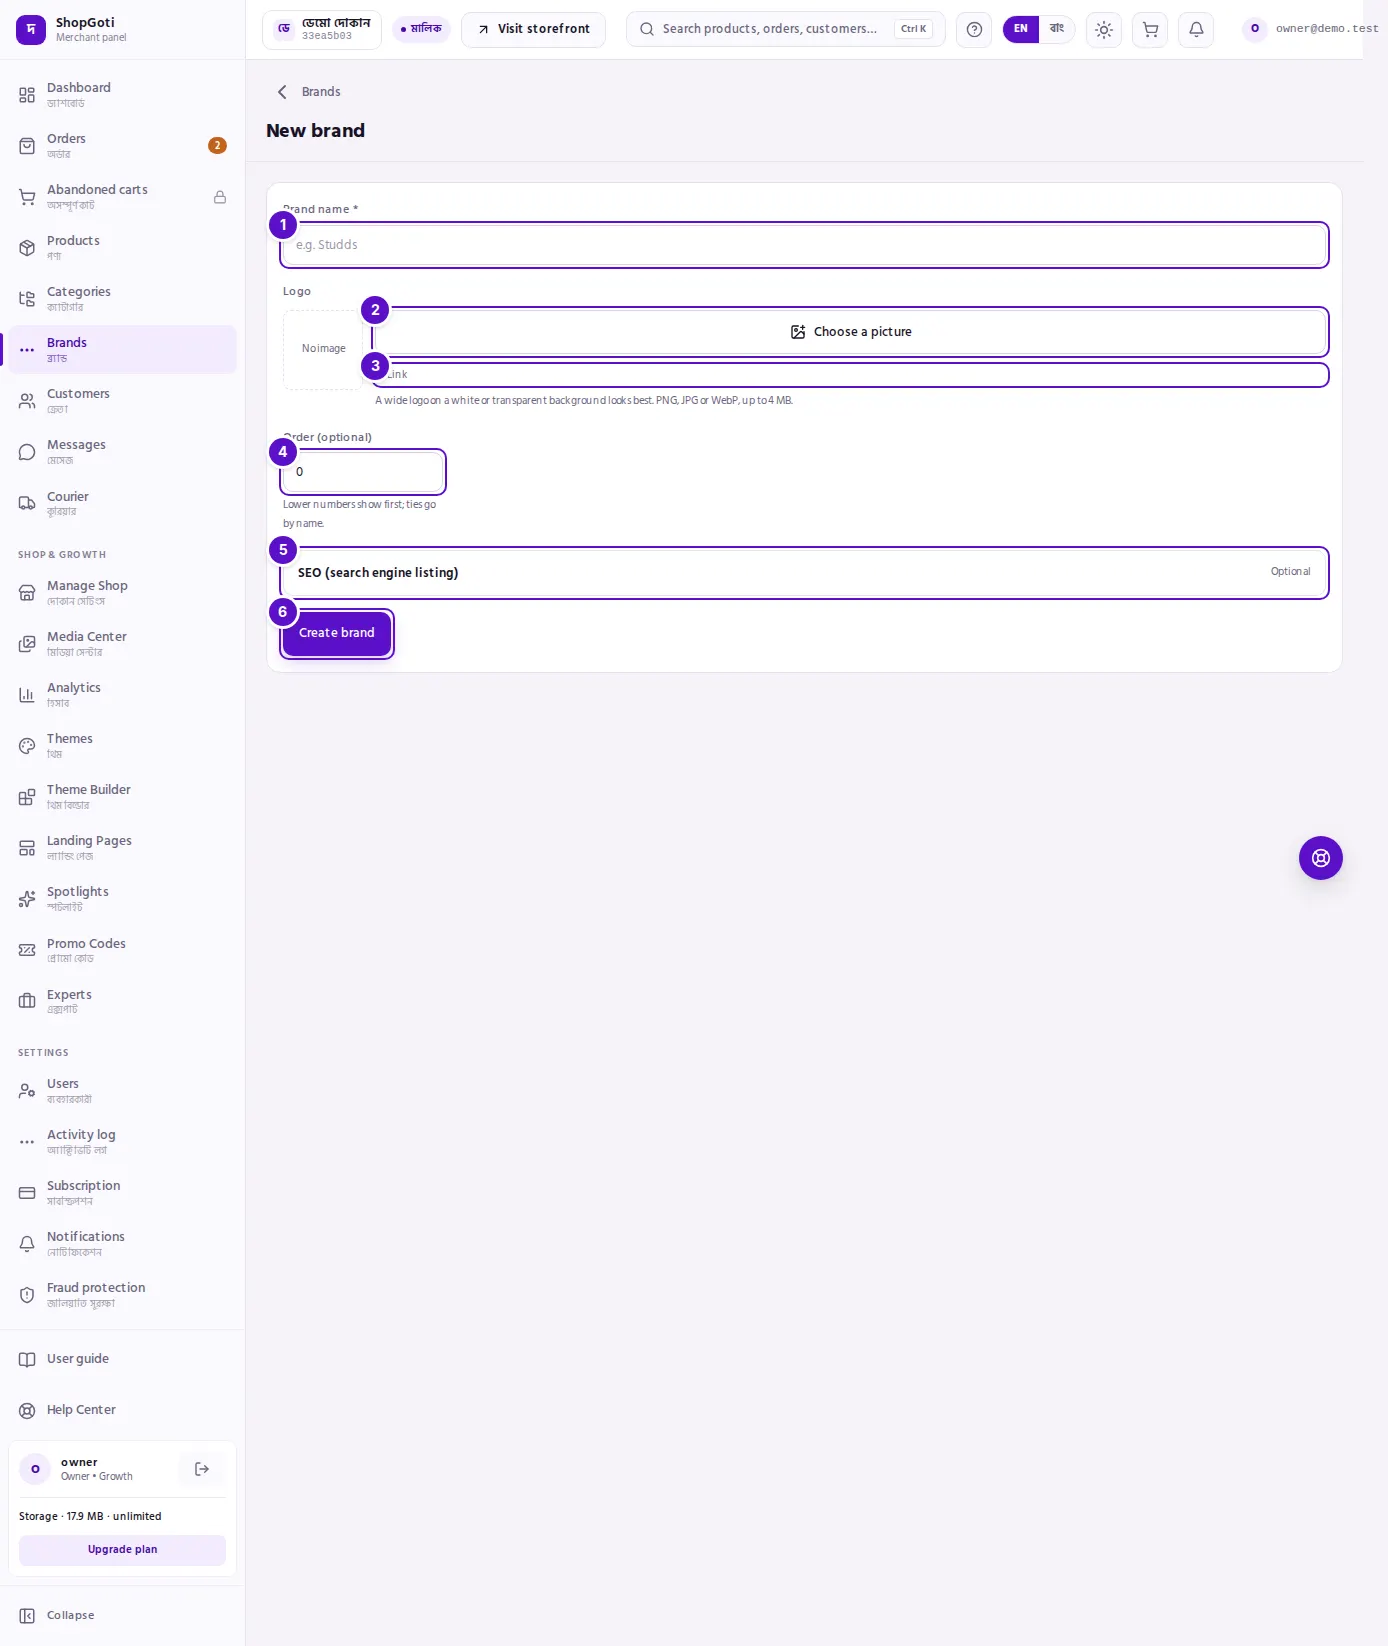
- Brand name — required, up to 80 characters.
- Choose a picture under Logo — opens the Media Center to pick or upload the logo.
- Or paste an image link — a box under the Link disclosure, for a logo that already lives on the web.
- Order (optional) — the position of the brand in the list. Lower numbers come first.
- SEO (search engine listing) — the title and description Google shows for the brand page. Optional.
- Create brand — saves the brand and returns to the list. On the edit page this button reads Save.
Steps
Add a brand
Steps
- Open Brands and press Add brand.
- Type the name in Brand name. Up to 80 characters. A name already on your list is refused.
- Optional: press Choose a picture under Logo, pick the logo in the Media Center (or upload it), then press Use this picture.
- Optional: type a number in Order (optional).
- Optional: fill in the search listing.
- Press Create brand. The list opens and shows Brand created.
Change a logo
Steps
- On the brand's row, press the actions button (three dots) and press Edit.
- To replace the logo, press Choose a picture under Logo and pick another one, then press Use this picture.
- To remove the logo, press Remove under it.
- Press Save. The list shows Brand saved. A brand with no logo shows its name in the shop.
Set the order of brands
Steps
- On the brand's row, press the actions button and press Edit.
- Type a whole number in Order (optional). Lower numbers show first.
- Press Save. Brands with the same number are sorted by name. A brand with no number is sorted by name too.
Remove a brand
Steps
- On the brand's row, press the actions button and press Remove.
- If no product uses the brand, the panel asks Remove the brand “…”? Press OK.
- If products use the brand, the panel says how many and asks again, with a warning that those products will lose the brand link. Press OK only if that is what you want.
- The brand leaves your list.
Fields
| Field | Required | What it does |
|---|---|---|
| Brand name | Yes | The brand's name in the list, on products and in the shop. Up to 80 characters. A name already in use is refused. |
| Logo | No | A PNG, JPG or WebP picture up to 4 MB, chosen from the Media Center. A wide logo on a white or transparent background looks best; the whole logo is shown, not cropped. |
| Or paste an image link | No | A web address for the logo, if it is already hosted somewhere else. |
| Order (optional) | No | A whole number, 0 or more. Lower numbers show first; equal numbers sort by name. |
| SEO title and Meta description | No | How the brand page appears in Google. Blank means the panel writes one from the brand name and the shop name. |
| Address (slug) | Shown on edit only | The brand's address in your shop, /brand/…. It is set when the brand is created and cannot be edited here. |
Tips and common mistakes
- A brand without a logo is still shown, by its name. A logo is optional; add one when you can.
- Renaming a brand does not change its address, so a link you already shared keeps working.
- Keep a logo in a folder of the Media Center, for example one you name "Logos", so you can find it again.
- Staff see the list, but add, edit and remove are for Owners and Managers.
- Removing a brand is the only way to take a brand off your list. If you only want a brand to stop showing on one product, change that product's brand instead.
Related pages
- Categories — the other way to group your products: by type.
- Media Center — where logos come from, and how to upload or crop a picture.