23.1Held orders
The orders that fraud protection held or refused, with the rules that caught them. Owners and Managers can allow one with a written reason.
- Menu:
- Fraud protection
- Who:
- Owner · Manager · Staff
- Package:
- All packages
- Updated:
- 2026-10-15
Overview
Opening Fraud protection shows the Held orders tab first. It lists the orders, and the order attempts, that your shop's rules held or did not let through. Fraud protection makes the decision by itself. This page only shows what happened. An Owner or Manager can allow one held order by writing a reason.
This page has four tabs. Each tab has its own page: Blocklist, Rules and Check a buyer. This page covers the Held orders tab.
Everyone (Owner, Manager and Staff) can read this list. Allowing an order is for Owners and Managers only.
Screen tour
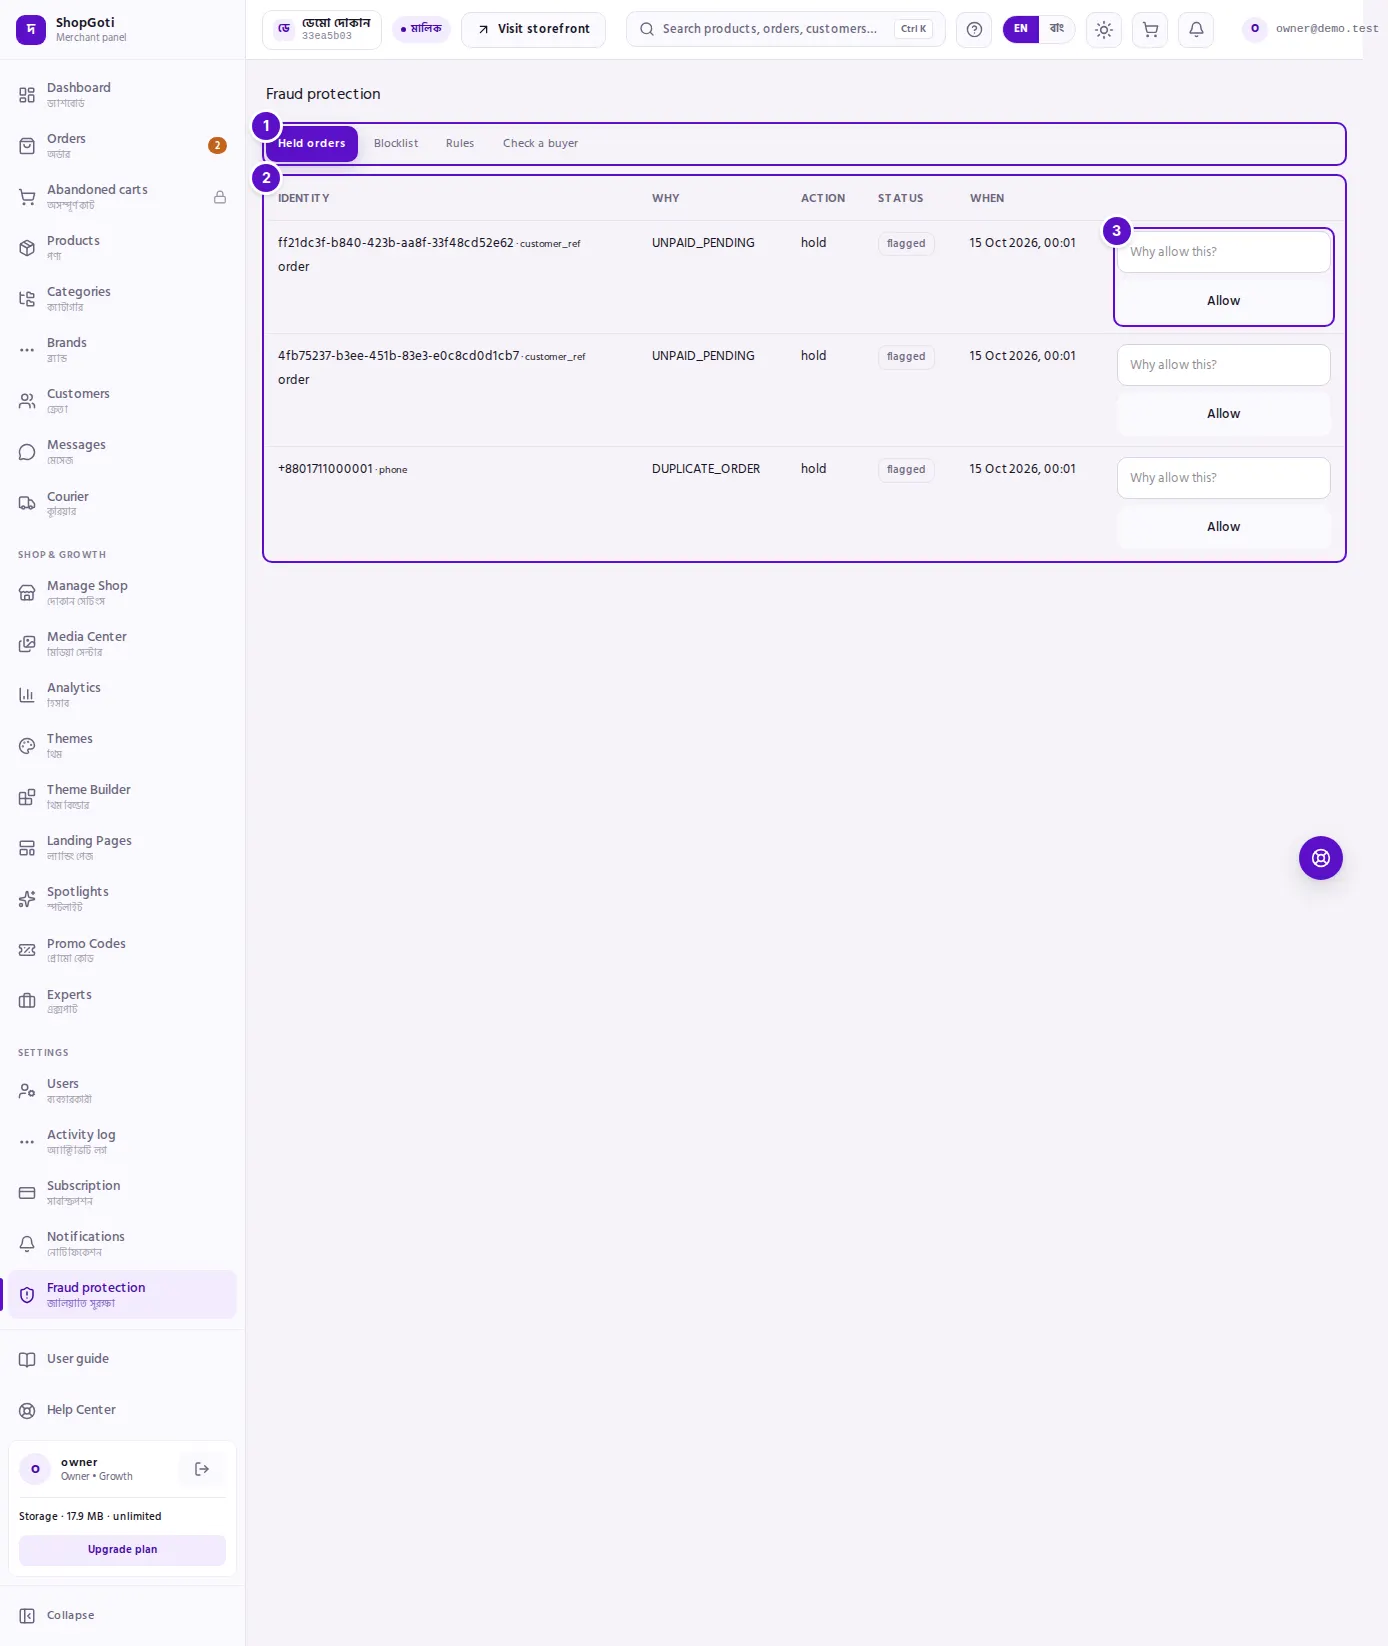
- Fraud protection tabs — four tabs: Held orders, Blocklist, Rules (Owners and Managers only) and Check a buyer. The open tab is shown in a different colour.
- The list — columns: Identity, Why, Action, Status and When. With nothing held, the page says "Nothing held."
- Allow — at the end of each row, a reason box and an Allow button. Only Owners and Managers see it, and only on rows that have not been allowed yet.
Steps
See the held orders
Steps
- Open Fraud protection from the menu. The Held orders tab opens first.
- In Identity, read the buyer's phone number or email. The type is shown beside the value. If the attempt became an order, an order link appears. Press it to open that order.
- In Why, read the rule codes that matched. If several rules matched, all of them are listed, separated by commas. If none matched, a dash is shown.
- Action shows what the protection did. Status shows where the row is now. If an order has been allowed, the reason you wrote is shown under the status.
- Read When for the time the attempt was made.
Allow a held order
Only Owners and Managers can do this.
Steps
- In Held orders, find the row you want to allow. Look at the box at the end of the row.
- Type the reason in Why allow this?. The reason is required. The order is not allowed without one.
- Press Allow. The row's status changes. The end of the row then shows who allowed it, using the first eight characters of their user ID. The row can no longer be allowed.
Fields
Allowing an order needs one field. There is one box on each row that can be allowed.
| Field | Where | Required | What to type |
|---|---|---|---|
| Why allow this? | End of the row, before Allow | Yes | Why this order is being allowed. If it is empty, nothing is allowed. |
Tips and common mistakes
- Staff can read, not allow. Staff see the list but not the reason box or the Allow button. Allowing and blocking are for Owners and Managers.
- "Why" and "Status" are different things. Why names the rules. Status says where the row is now. A row can have a matched rule and still be shown as held.
- Check the order first. The order link opens the order's details. Look at the buyer's history and payment before you allow it.
- The same buyer can appear more than once. Each row is a separate attempt. If one number keeps appearing under the same rule, check the Rules tab.
- An allowed row cannot be undone here. Once allowed, the row no longer shows the button, and this page has no way to take the allow back. Write the reason with care.
Related pages
- Blocklist — the phone numbers and emails you have blocked
- Rules — the limits that decide when an order is held
- Check a buyer — check a buyer before you take the order
- Orders list — all orders, by status and payment